Among Mumbai’s roughly 12 million inhabitants are many talented craftsmen. Over the last several months we’ve ventured out to find some of them to collaborate with on some new projects. It’s been a long and involved search, but as of now we’ve formed some nice relationships and have many interesting things to show for it!
We began with a lengthy list of potential objects we wanted to produce – hopefully to be ready for the year’s end shopping spree. Over the course of finding vendors and making numerous prototypes, we narrowed the scope of viable objects down to just a few manageable ones. For now these include: gift tags, lettering stencils, wrapping paper (coming soon), magnets, and notebooks. Each of these relatively simple products came with their own set of complications; today we’ll share a bit of the process of manufacturing the notebooks.

The Design Process
Ideas are never in short supply, so we designers usually enjoy the initial exploration time the most. It’s fun and inspiring to come up with endless concepts, then to reduce and refine directions until you are left with just a few.
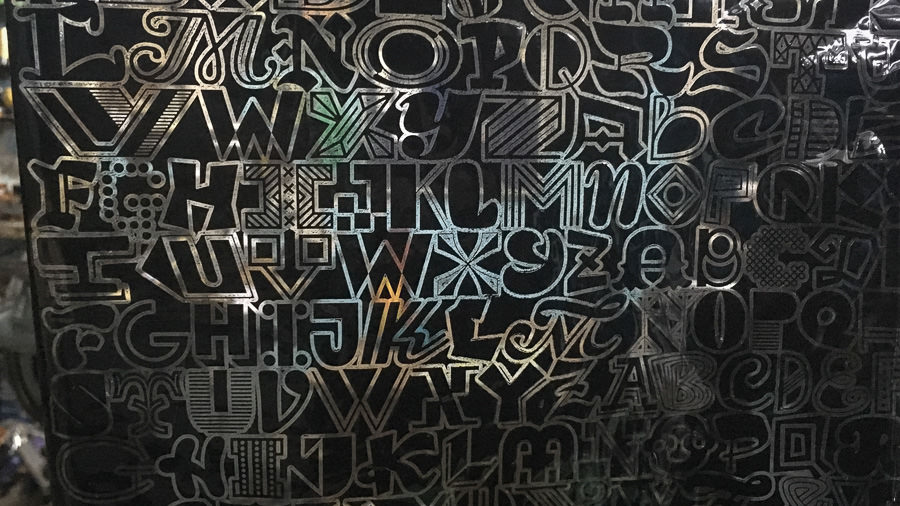
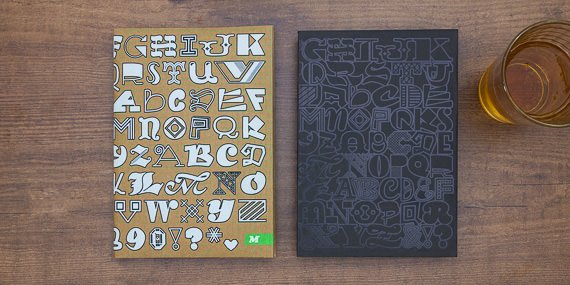
We settled on two related, yet drastically different, directions. They are both based on a still in-progress font of ours called Collection. This typeface began with Rob drawing several thousand random letters on tracing paper – this is what directly inspired both the cover designs and the idea to make one notebook of tracing paper. For the second notebook we simply wanted something unlike all other typical notebooks. This one is more subtle with a black on black cover (we call it the B/B Notebook) with gray pages inside. As for the other defining features, both are about A5 sized (~5.5 × 8in) and have 64 pages (B/B) & 80 pages (Tracing) to make them a handy and easily portable format.

Picking the Perfect Paper
Sourcing paper is always an issue here in Mumbai. Stocks of what are available, and at which vendors, is always changing. Often you need luck to find just the right paper. After visits and calls to many different shops and markets, we ended up getting all the various papers from one vendor – Paperina in Andheri East.

Finding New Screen Printers
The next step was finding a screen printer able to print the Tracing’s cover. There are gate folds with a grid that wraps all the way around, so that required a printing area of about 22 × 60cm (8.5 × 24in). The regular screen printers we usually work with are quite good, but they only do smaller sized prints. After asking around and visiting several workshops, we found another local printer that could do the work – Shubhankar Screen Printing in Andheri East. He printed the wide grid in two parts while the main letters were in one screen; so in total it required four screens and four times on his table just for this one cover.

Hot Foiling
Simultaneously to the screen printing, we sent out the work for the second cover’s black hot foiling. This was one of the quickest steps, since we frequently work with a foiling specialist – Gold Print, Andheri East. He was able to do our relatively simple job quickly and without any issues… So fortunately there’s no interesting drama to report here.


Judging Notebooks By Their Covers – i.e. The Binding
As a contrast, the last major step of binding everything together was grueling. This is in many ways the most important part – because the aesthetics of the notebook should always come second to how it functions.
We knew for certain we didn’t want to generically staple or wire bind these notebooks. We planned from the beginning to stitch them with thread, which to us looks more elegant and special. First finding a binder to stitch these was abnormally difficult. Eventually we found several places, then narrowed those down to a couple after speaking to them and seeing their work. Two places made a few rounds of sample mockups for us, but there were always problems. In the end, RK Binding House in Sakinaka seemed like the best option – mostly thanks to their willingness to experiment and find the best solution to problems.


The B/B Notebooks were fairly straightforward to bind. But our original idea of stitched binding was eventually abandoned because the paper and cover were so thick there were issues with sewing a perfectly straight line and then having the paper folded nice and flat. Had we used thinner paper, or less pages, this might have worked better. But as it was, stitching didn’t make for a great experience when actually using the notebook.
We instead opted to have the B/B Notebooks perfect bound. This was a major unexpected change, but in the end it gives a cleaner appearance and allows you to open the book wider to use it more easily.

Once the B/B Notebook was finished, the binding of the Tracing book was the last element to complete. Again we went back and forth with several binders and again gave the job to RK Binding House… but not without more changes and complications. We had still hoped to stitch these notebooks, but that turned out more difficult than with the B/B ones. Tracing paper has different properties than regular paper – the binders and paper vendor describe it as ‘hard’, it is actually very difficult to stitch and cut. When stitching, the needle would somewhat tear the paper, and then cutting the final bound book was also tough because the stitches weren’t strong enough to keep the pages from shifting while cutting. The end result was always a bit off, it was never straight and square as you would expect.
This lead us to a completely different binding technique: these are also section bound, but with the addition of an extra sheet of brown paper around the outside. The brown sheet is then glued to the cover – rather than simply gluing only the spine to the cover. This method is both strong and the spine remains flexible. However, this direction was not without it’s own problems: here we had a hard time finding a glue that was compatible with our paper. The binders have one main glue they typically use on everything. They began working with this and it seemed fine at first. But as it dried, the book covers warped significantly. We tried to counter this by pressing them and weighing them down overnight. That helped quite a lot, but as the glue dried it formed little wrinkles on the outside cover, and those would never go away. So, the binders tried tape, alternate glueing techniques, and then two new adhesives to try to solve this problem. In the end, the absolute last glue option they could come up with worked pretty well. It’s clean, smooth, and the warping was minimal. It took about 15-20 prototypes to get this to work and had this final glue not worked properly, we would have had to start over somehow.

Risky Business
One last thing to mention that we learned during all this is about the risk involved with this style of production. When one company fabricates everything from start to finish they must take full responsibility for the outcome. If in the end the product is not correct or perfect it’s clear they need to fix or redo it. This gets much trickier when each little step is being done by a different company. As the process advances the risk gets higher because at some point it’s simply not possible to recoup the expense if something goes wrong. Maybe the binder is imprecise with the folds, or sloppily gets glue on the outside edge of every book, or the final cutting is too drastic and the design gets cropped. These things happen. But it’s impossible at this point for the binder to take responsibility and pay for the damages. The cost to replace all the paper and to redo the screen printing or foiling is probably more costly than what they’d charge for their work. So if something goes catastrophically wrong about the best you can do is not pay for that step in the process and start all over.
Our risk for this round of notebook production was not substantial because we had only 100 of each book made (minus many during prototyping, and ones with too many flaws to sell). The total material and production cost makes up about 50% of the final msrp price. Of that, roughly 50% went to the paper, 25% to foiling, 17% binding, 7% to screen printing, and 1% for packaging. The remaining 50% of the price covers the hours (weeks) required to design, prototype, visit workshops, photograph, and package & mail out orders. Clearly we don’t have MBAs, but nevertheless, this a has been fun and educational experience that we really enjoyed :)

All Work Is A Collaboration
Since this process was so laborious we wanted to highlight the often forgotten fact that things like these are made by actual people. In some places this process can be more automated and machine-aided, but generally, almost all products are worked on by many people. All together there were about 15-20 individual craftsmen helping with to make these notebooks happen. They worked at the following places:
- Paperina, Andheri East
- Screen Printer, Andheri East
- Gold Print, Andheri East
- RK Binding House, Sakinaka
(As with most local business, none of these companies have websites. If you are looking to get in touch with them just let us know and we’d be happy to help connect you.)
Thanks for reading! We hope you enjoyed following along with this process – and that you like the notebooks! You can check out the final notebooks here.
PS– Here’s a little bonus movie featuring some clips we shot while making the notebooks. It’s not comprehensive, but it gives a glimpse of the process.
